ITR Z3 rebuild thread

Z3_GoCar

New member
I thought I'd document the rebuild of the Z3, mod-Zwei.

Well, here's the rear suspension sub-frame in the back of the truck
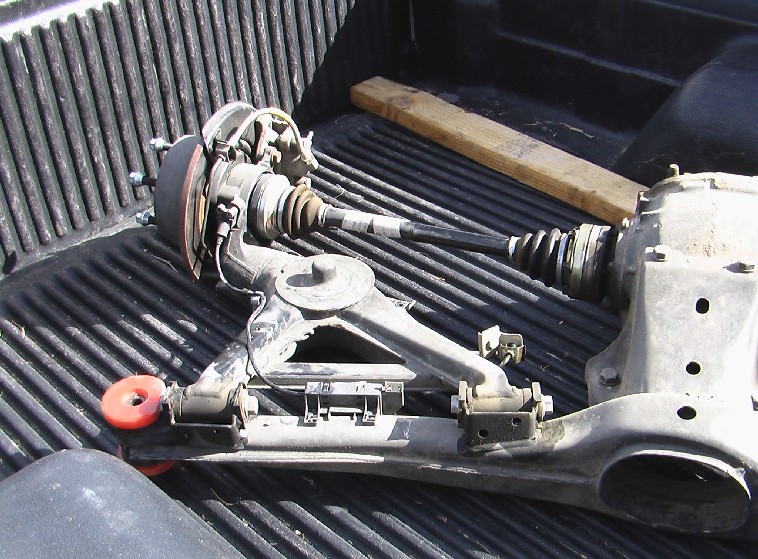
twisted_racer1.jpg


This was the barely perceptable tweeked side. On the other side:
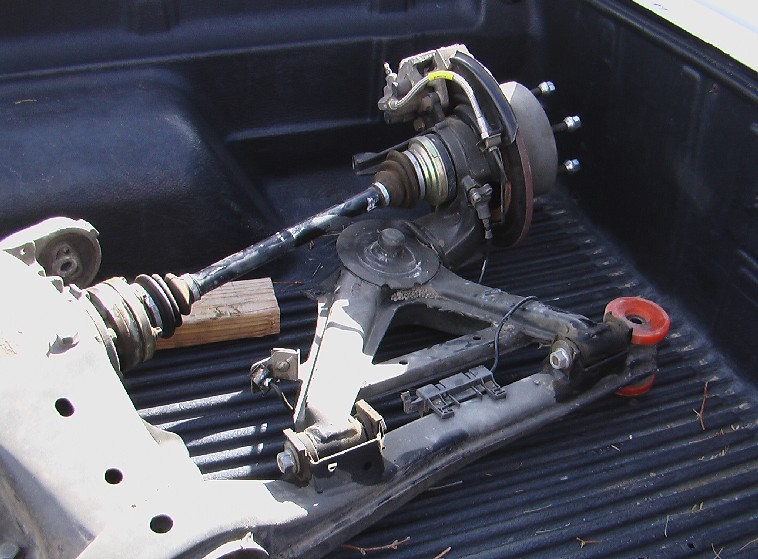
twisted_racer2.jpg


The twisting is more severe and toed in for extra stability :o Also notice the single "Mickey" mouse ear on the differential. This is how it sat for the last couple of months. Then two weeks ago I went to the auto-hobby shop. Next update; the new arms have new bearings, are on, and it's back in the car along with a bondo-update and a new steel hood in Imola Red.

James
 
Thank you Mr. webmaster. With the photo hosting I can update the state of my Z3 : )

Here's a close up before of the rear wheel, finder, and door:
picture.php


and here it is after some hammering, body filler and a new trailing arm:
picture.php


This is the front horn before I started pulling and hammering on it:
picture.php


and this is the left side now:
picture.php


I've got several more, so I'll post them later.

James
 
One of the areas that really looked bad was the rear. The gap between the finder and trunk lid was much wider on the left. Now it's much closer to the right side:
picture.php


Actually both the rails running from the strut towers were pushed down. Now after lots of hammer work they're closer to where they were. Also, the main horns look straight.
picture.php


With the core support out I plan to pull the motor and take whats left of the pan off. The least expensive route may be to find a doner M-52-28 to put back in that I won't have to touch for a couple of races, and I know a salvage yard motor will probably be legal, and now I'll have a spare motor to rebuild evantually. I like to imola red, I'm thinking of painting the windshield frame and maybe a strip around the top of the door red, then leaving the main body color silver. This next photo is how the hood fits over the finder and door, also note I've taken the apron cap off of the windshield frame, this piece of sheet metal has been on order for the past month along with a new set of brake lines for the rear.

picture.php


I've been busy with the primer and spot filler. I've been using plasticote's grey from the local N-A-PA. It's lacquer based along with the spot filler, I've found several links for factory silver and red in spray cans. See the $50 paint job thread. Slowly but surely I'll have it together eventually.

James
 
Last edited:
Wow, that is a lot of work my friend. Good job on it, looks like she is shaping back up right nice.

Thanks Jeff,

It's suprising how cathardic, and cheap hammering on metal can be. I was fortunate that the damage wasn't much more than skin deep.

James
 
Hey James.

I'm impressed, you're going to fix the whole thing WITHOUT even taking it off your trailer!!
 
Looks good! Glad it's coming back together. Do you have any idea of when it might be track-worthy again?
 
Hey James.

I'm impressed, you're going to fix the whole thing WITHOUT even taking it off your trailer!!

Hasn't been off since you helped me pack up last Labor day. I'll probably push it off to pull the motor, but I'm waiting untill I get the windshield apron, so I can weld it on at the same time as I pull the motor. I took it off the jack-stands and it's back on the wheels.

I didn't get a chance to talk to you after Long Beach. Did you have fun?

James
 
Looks good! Glad it's coming back together. Do you have any idea of when it might be track-worthy again?

Hey Josh,

I hope to be out before the end of the season, now that I'll have a regional license to keep up. I'm always running at the end of the season and not the beginning.

BTW, the ITC #63 510, we did the same super-school.

James
 
Newsflash,

I just recieved a package from Pelican Autoparts, it's my new rear brake lines and the header panel for the drivers side windshield frame. I ripped the old one off and tried to beat it back into shape before deciding it just wouldn't give anything close to the original shape. I also just purchased a used oil pan and intake manifold. I'll go through the motor and re-bearing/ring it, maybe even check out the valves, and contact my tuner to see if he has a source on matched stock bosch injectors. Unfortunetly, the race car now has competition for my wrench time as the ac pump on the truck froze up, with only one belt it's out of action. I think soon I'll be looking for a basic 1/2 ton to tow with.

James
 
I just added this picture, one of the few I have of the car in action:

picture.php


This was at Buttonwillow, the 200Sx belonged to Naji, who had an encounter with the tire wall the same weekend that I rolled.

James
 
One thing you can say about using the trailer to work on, it's easier to find places to tie the car to while you pull/jack things back in place!

Good work James, be sure to get the factory dimensions on the front horns, etc to make sure everything is square and proper.
 
you gonna come run that thing in SFR ITR?
we are needing more people....

Hey James,

You might see me at a couple of races next season, but I doubt I'll make the long drive for me to Thunderhill. So, most likely a Laguna-Seca race then maybe at Infineon.

A brief update, the car is off the trailer and I've pulled the motor a transmission yesterday. It only took a couple of hours including removing the hood and disconnecting the power steering lines and clean up. I'm really sad about the pan. Because, it was from a euro e-36 M3 and is a couple of quarts larger than the stock pan I've got to replace it with. I wish I knew someone who could weld it back togeather. I still have to split the transmission, and put the motor on the stand. Maybe I'll be doing that tomorrow. I'd be taking more photo's if I weren't doing all the work myself.

James
 
james,

if the pan is steel I can weld it for you (but Im guessing its aluminum)

I appreciate the offer, but alas it is aluminum. I yanked off the transmission and pulled the clutch. Now I'll need a torch to break the locktite on the flywheel bolts and mount the motor on my engine stand. In the meantime here are some photos I snapped this afternoon:

Same as the Subframe, the truck bed makes a good place to take it off the hoist:
picture.php


Here's the hole in the oil pan, I have the missing triangle piece:
picture.php


The motor mount was litterally ripped in half:
picture.php


James
 
your pan can be fixed...
that is not that bad
I had a cracked ducati engine case welded before and it worked fine...
if you cant find a guy down there I am sure someone up here in santa cruz can weld it....
the hardest part is getting the oil out of the metal to weld it.
send me your info if you need help..
crashtest22 at gmail
 
James.

If you can get the pan to me. I know a very good certified welder who can work miracles with aluminum.
 
your pan can be fixed...
that is not that bad
I had a cracked ducati engine case welded before and it worked fine...
if you cant find a guy down there I am sure someone up here in santa cruz can weld it....
the hardest part is getting the oil out of the metal to weld it.
send me your info if you need help..
crashtest22 at gmail

Is it alright if I call you JC?? The one chunk is only one piece of many and several rips in the aluminum. Also, it's a double wall casting, with a cast in windage tray, that would need to be removed to get to the inside. Actually, it's a really neat piece and it's also got a double pick-up on the pump, the main rear one and a smaller one in front.

James

If you can get the pan to me. I know a very good certified welder who can work miracles with aluminum.

Hey John,

Thanks for the offer, but I might know someone locally who can do it also.

James
 
Back
Top