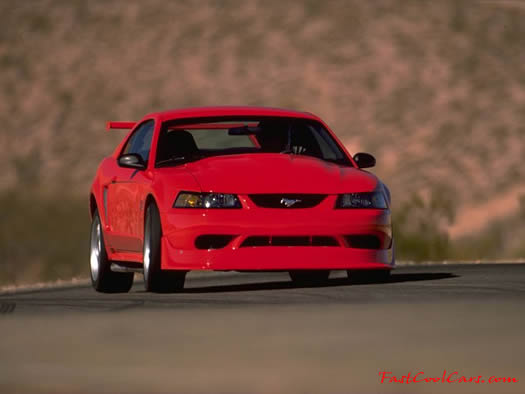
ITS Ford Mustang(s) Build - Stripper Stang Part II

There are a couple of extra bung spots that were put in for a wideband O2.

Lots more work last night with the camber plates installed in the green car, camber checked and adjustments made to get the proper range, 0 to -3.5 degrees, cold air block off plates made (legal, the Mustang takes air from outside the engine compartment stock), and a few other things.

The camber plates do not provide enough adjustment stock, none of them do, so you have to either slot the upper chassis holes or use "camber bolts" at the strut/hub interface. Either way will get you plenty of camber at ride height. Jeff G has been heavily investigating some proper hub centric spacers for the front and rear. We made measurements a few days ago that showed that with the long studs in the hubs, and non-hub-centric spacers, the wheels had far more runout that we'd like to see. So, more fab work coming up.

I have looked at the seating position in my car and found I need to drop the rear of the seat down an inch or two for better leg support. This will lower me even further almost to the point where I can't see over the dash. The Mustang is a "big" car by ITS standards and I've a feeling I'll end up looking like a midget driving it. So be it, a midget with a grin on.
 
Last edited:

A bit more work tonight. Jeff worked on the spacers some more, alternator, wiring, and the coil pack for his motor. We've learned that they are not the same throughout the years, more little nuances that makes you go "yay".

I continued the fab of the air intake. The stock air system has a big air horn and housing that takes air from the fender well. This can all be replaced and since our engine pulls air from outside the engine bay we can continue that on the IT car but in a more linear fashion. We're still passing through the stock MAF and throttle body.

All air entering the intake tract shall pass through the
carburetor or fuel injection air inlet. All air must also pass
through the stock air metering device, eg MAF, or AFM,
etc if so equipped. Air intake source shall be within the
confines of the engine compartment or stock location.​

Also left out a collector pic from the other day that I'll link.

collect.jpg


intake.jpg
 
Last edited:
That fender snorkel is boss. Is there a fender liner in there to prevent water from getting sucked up if it rains?

I love this car.

K
 
Not quite sure what I was trying to say in that pocket induced post above!

Ron the car looks great. Can't wait to see it at the track. Hoping that its in my rear view mirror! Lol j/k at the rate I'm going with my shoulder surgery and not having an engine, it will be Charlotte before I make it out on track.
 
That fender snorkel is boss. Is there a fender liner in there to prevent water from getting sucked up if it rains?

I love this car.

K

Thanks guys, remember there are two of these coming out at the same time, not just one, so there is a good chance you'll see a stang on track.

And yes, there is a liner that will keep the filter dry. The filter will end up high, basically at the top of the fender, and the air intake for the filter is supplied via various gaps in the body, front clip, and so on. It shouldn't come in contact with any water unless the front of the car gets submerged.
 
DST still messing with me for some reason so I was out in the shop early this morning. Managed to press in new ball joints for both lower arms, finished up the bushings, hang them on the car, check lines/sway bar mounts, and start prepping the upright for installation. I'm hoping to get the suspension work done on the green car can catch it up with the red car.

press.jpg


lines.jpg


mounts.jpg
 
Long weekend in the garage. Both Jeff's stopped by and we accomplished fairly long list of jobs:

*Brake ducts fabricated and installed, job took about six hours all told
*Front arms finished for both cars, all welded up now
*Pinion angle set on the green car
*Tank on green car removed and re-installed with new fuel pump
*Sway bars installed on both cars permanently
*Front suspension nut and bolted on both cars
*Brakes finished on the green car, all lines installed
*All fluids filled in green
*Spare hubs prepped with longer studs

Sunday was an even longer day for some. I had some wonderful food at a local Italian joint near my house on Saturday night and all day Sunday I was emitting variously flavored methane gas at a fairly high rate. Rough day.

makingducts.jpg


The TIG welder broke and its warranty replacement came this week. Worked great.

ductdetail.jpg


ductinside.jpg


We got to talking about brakes and looking around in the GCR the Mustang brakes are actually larger in diameter than the 2nd Gen RX7 brakes. I don't know about swept area though, and we've only got a single piston, but on the other hand lots of cars with great brakes utilized single piston calipers, like the E39 BMW M5.
 
finishedbrake.jpg


The front suspension of this car has been a bear. This weekend we've finally managed to get all the parts on the car, in the proper configuration, and give it a test. We were really pleased with the results. Spring angles are great, ride height is where we want it, and the sway bar geometry is correct. Not sure we could have done much better with what we've got and it is always a pleasure to have things work out the way you want.

bardetail.jpg


swayconnected.jpg


The rear has been bolted up for quite sometime but nothing was aligned or adjusted. Making some careful measurements at ride height I've got the pinion angle set right around two degrees which should be a good starting place for adjustments and dyno work. It takes a lot of time to work this stuff out and it can be quite frustrating.

reardetail.jpg
 
Shop pic. Things are much improved with way more parts off the floor and on the car than last week.

shop.jpg


tank.jpg


Attention will now be turning to wiring and sensors. I've got a number of gauges and data logging to rig up and I suspect it'll take quite a bit of time. However, we're thinking we might get to start on of the cars in the next two weeks. Yahoo!

oiladapter.jpg


These projects have taken a bit longer than we have anticipated. These two IT cars are not the only IT cars we've ever built, but they have had more than their fair share of challenges. We've had some great assistance from Dave Brown, Ford man extraordinaire, and he'll be assisting us more in the future with engines, transmissions, and setup. In fact we've commissioned a third engine for the cars as a spare and with all the other Mustang spares we've got we'll be racing these cars for a long time to come. Hope they work well!
 
Last edited:
Plans are being made for a motor start. It won't be this weekend, but we think that we'll fire one up on the weekend of the 30th. Been a long time coming and I hope it works out well. I'm making final changes to our initial tune file now.

basefuel.jpg

The base fuel table is commanding a 0.842 x 14.6, 12.3 A/F at WOT and a high load factor. I think this will be fine for initial running and break in, but I think we'll want to push it to the high 12s/low 13s for max power, depending on how it behaves when we futz with spark.

crank.jpg
 
Last edited:
I take it the filter block is a rerouting junction that sends oil to the cooler? I assume a thermostat is internal?
What have you decided to do about front end aero? With brake ducts, oil cooler, water cooler, and the desire for less drag, and possibly downforce (or less lift), I'm sure you done a lot of research.

Yes and yes.

But front end aero is a big question. The rules don't favor cars with integrated/molded bumpers since nothing can stick out in front of the car profile when viewed from above. And, the lower part is almost out as far as the middle part, that is, the "bumper". If you look at a stang from the side the lower "chin" isn't much recessed behind the bumper. We have some ideas but it is very likely the car will hit the track without a splitter.

Now, if we could use the aftermarket, holy sheet batman, there are 10s, maybe hundreds of integrated splitter designs. Here is just one of many (no comment on effectiveness, just an example):

54_2_products_cobra_r_body_kit_full_promo_pic.jpg


Ford produced some too and a couple worked as they were campaigned on factory cars.

2000-cobra-r13.jpg


But they are integrated and require cover replacement. We might could cut something like that off and rivet it on.

Here is a stock view of what we're dealing with on the V6s:

1.jpg
 
Last edited:
I'm with Jake, looks liek you have 3-4" of room between the plastic bumper and the bottom of the wheel in that picture. not sure what your ITS example will wind up with, but a recessed area can be very effective, too.

I can't wait to see these things in person.
 
I'm with Jake, looks liek you have 3-4" of room between the plastic bumper and the bottom of the wheel in that picture. not sure what your ITS example will wind up with, but a recessed area can be very effective, too.

We agree, but we figure they just might not be done for the first track excursion. We're thinking of a splitter/undertray sort of affair tucked up under the nose there.

Looks like tonight we'll be adding some bars to Stang #2's cage. Owner wants a taller door bars on the side so we'll be putting a third bar above the two NASCAR bars that are already there. TIG is a wonderful thing.
 
Front splitter on a Mustang V6

Ron,

First...great build man. I am bewildered by the work you have done in such a short time.

Second...Be aware that the V6 (stock nose) is designed to be a "bottom feeder", with the area directly under the nose to have a positive pressure to feed the radiator. Putting a spoiler/splitter that blocks off that air to the underside of the nose, may starve the radiator, or even, create a lower pressure and therefore impede the flow thru the radiator (lower pressure in front than expected).

All the good Mustang noses with larger front openings are in the GT, or Cobra as you have shown, or custom, all of which I thought are not legal (different model?).

We had to drop a blade style spoiler at the position of the core support (behind the opening) to force air up into the radiator, with resultant over heating problems when it was torn off. Stock had one too.

Just a thought to share.

Good work,

Bill
 
Another weekend, another weekend in the garage. The weekend started early on Friday afternoon. My buddy Deon is building a custom chopper and has been using my TIG rig to do the welding. Since he is just about ready for paint I decided to take advantage of the spraying going on at his house and disassemble my Buell to have it painted.

bikeapart.jpg


Got all the parts off and wet sanded everything for prep. Meanwhile, Deon started work on the last welding he needed to do for part of the handle bars and I joined in about 8pm. Four hours later we finished up that fab project and were bushed.

deonwelding.jpg


A bit of stang work got done those as I finished the lines for the oil cooler and installed the temperature sensor for the oil. Also, I removed the front bumper to install the air filter and rig up the tow strap.

cooler.jpg


filter.jpg


It doesn't look it, but that filter in the fender well is huge. Probably around 10" long and 6" in diameter. Good stuff, it is nice having a car with some room.
 
Last edited:
Saturday morning we started back up at 830. Jeff G wanted to add in a third bar on his cage for the driver's side and spent the morning cutting and fitting the pieces.

newbars.jpg


He did some really nice work there. You guys that build your own cages got my respect as it is a lot of hassle and makes a huge mess. I'm still picking metal splinters out of my hands.

Anyhow, round about lunch he got to welding on it and putting it in place.

tigitup.jpg


Tack it in place, then come over to the bench to weld the pickets in place so you don't have to weld upside down.

tigitup2.jpg


The party got cut short though when we ran out of Argon. We used a lot on the bike project the night before so we'll have to lay off that until Monday.

While Jeff G was kicking it on the bars I was doing a number of other tasks involving wiring, plumbing, tow straps, and interior of the green car.

First up was getting rid of the Ford OEM connectors on the fuel filter. The fuel filter is well-positioned at the rear of the car but has those blasted push-pull connectors that require special tools, and really strong fingers, to unlock. We're using the same Ford OEM filters on the cars but replaced the connectors with fuel injection hose and FI clamps. That way we can service the fuel system with standard tools.

fuelfilter.jpg
 
Back
Top